Using AWS and CloudFront to enable SSL and HTTP/2 on your Grid site
As the undisputed leader in cloud computing (constantly expanding), there are more than a handful of reasons to use AWS to distribute your grid site to the world.
I personally hope to use more AWS services in future, and so thought I’d write this post to show just how easy it was to transfer my domain to AWS, and host the site using CloudFront. Besides where do you think those grid images are stored? (hint look at the source)……
If you checked my previous post, there’s a fair bit of optimisation work to be done before this grid site (and others) are really flying but I’m also hoping that at some point I’ll be able to take the AI generated site and augment it with whatever my mind sees fit (Lambda anyone?).
So here are the steps I took to migrate from my existing DNS provider over to AWS.
Note: I’m presuming you already have an AWS account and are familiar with the services and console. If not, you are going to want to spend a bit of time understanding the basics of AWS and securing your account. There’s plenty of info on the AWS site to get you started e.g. https://aws.amazon.com/blogs/security/improve-the-security-of-your-aws-account-in-less-than-5-minutes
Lets get started by signing into your AWS console (or registering if it’s your first time) by browsing to https://aws.amazon.com
Step 1 (Optional) - Register or Transfer your domain name to AWS
You don’t have to use AWS to manage your domain but having everything within a single console makes life easier.
If you choose to transfer a domain to AWS, you’ll need to create a Hosted Zone first, that way you can specify the new nameservers when you start the transfer process. Oh and transfers might take a few days depending on your current provider.
If on the other hand you choose to register a new domain with AWS, you’ll find an automatically created Hosted Zone under the Hosted zones section of the Route 53 console.
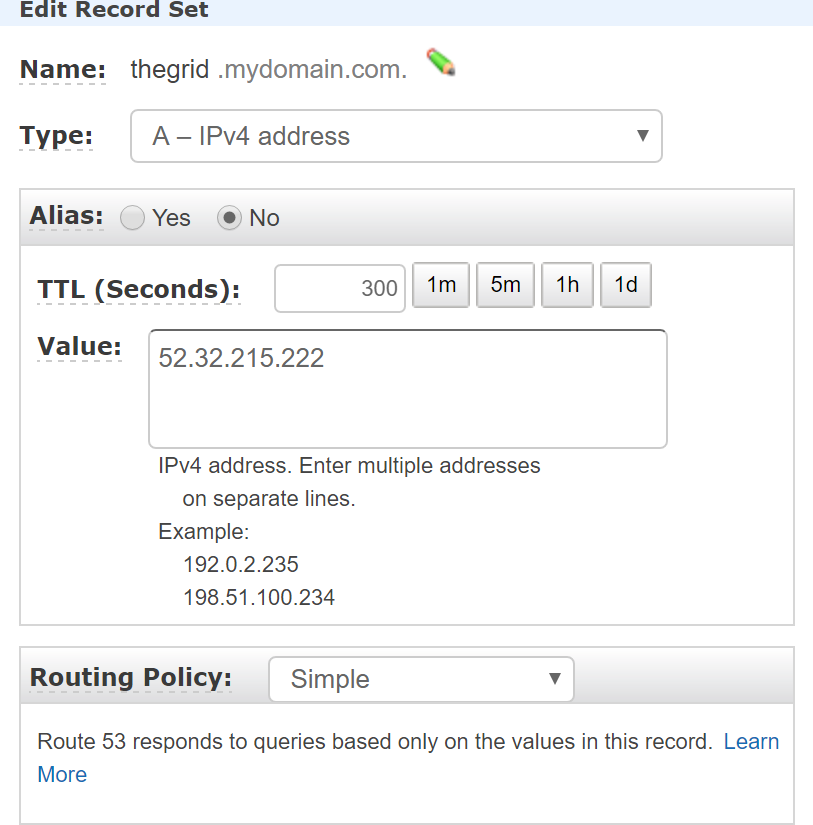
Step 2 - Create an A record (Record Set)
I suggest creating a non www record at this point, so that you can test your domain is up and running, and bypass the CDN when testing e.g. thegrid.mydomain.com
The current IP address to use is 52.32.215.222 but i’d suggest checking thegrid help just in case this has changed - http://help.thegrid.io/article/244-v2-add-a-custom-domain
Step 3 - Update the Custom URL for your grid site
Under the settings section of your grid site you are going to want to change the Custom URL to match the A record you just created. Use HTTP here, we will enable SSL on the CDN later.
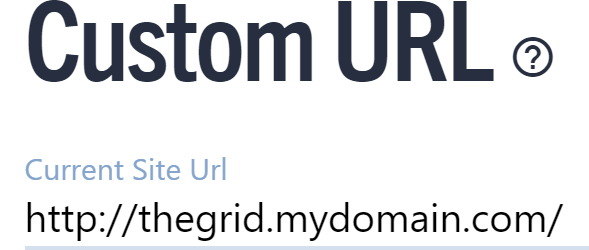
Test your new domain by browsing to your new A record e.g. http://thegrid.mydomain.com
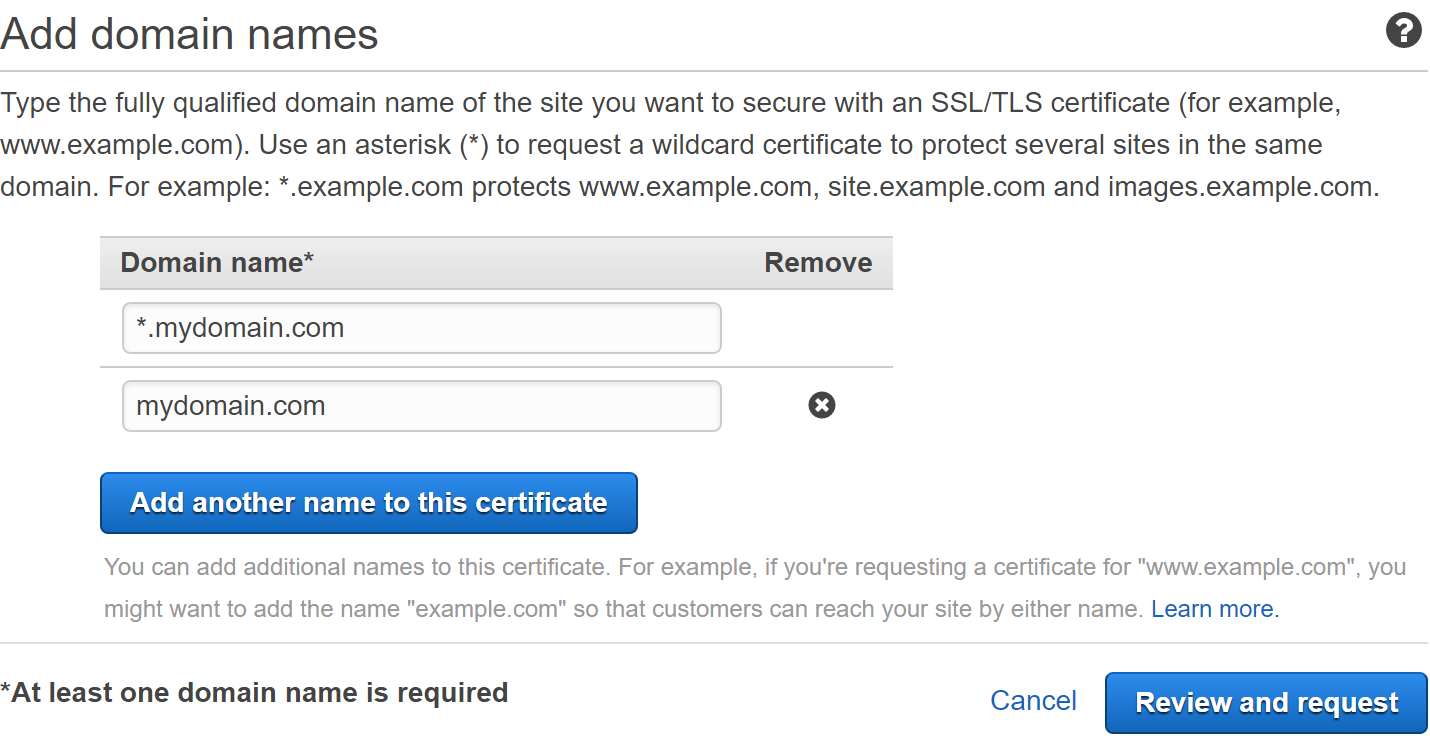
Step 4 - Create an SSL Certificate using AWS Certificate Manager
So you have a cool domain name and your Custom URL is working as expected. The next step is to create an SSL cert that you can use to encrypt your HTTPS traffic. This will come in handy in when we turn on HTTP/2 support as many browsers will not switch to HTTP2 when unencrypted.
If you have several domains you can add them all to the same certificate e.g. .com / .org / .net
Step 5 - Create your CloudFront distribution
There’s a load of options to choose from when creating a distribution but most of the defaults will suffice.
The options you are going to want to edit are as follows:
- Origin Domain Name - this should be the same name as your Custom URL e.g. thegrid.mydomain.com
- Viewer Protocol Policy - I’d suggest Redirect HTTP to HTTPS for this to get any future benefits from HTTP2
- Alternate Domain Names - This should contain the same list of domains you added to your SSL certificate e.g. *.mydomain.com, mydomain.com
- SSL Certificate - Choose Custom SSL Certificate and select the SSL certificate you created earlier.
You will want to make a note of the distribution Domain Name so you can update DNS to point to it in the next step e.g. xxxxxx.cloudfront.net
It’s also a good idea to wait until the distribution is showing a Status of **Deployed **and State Enabled
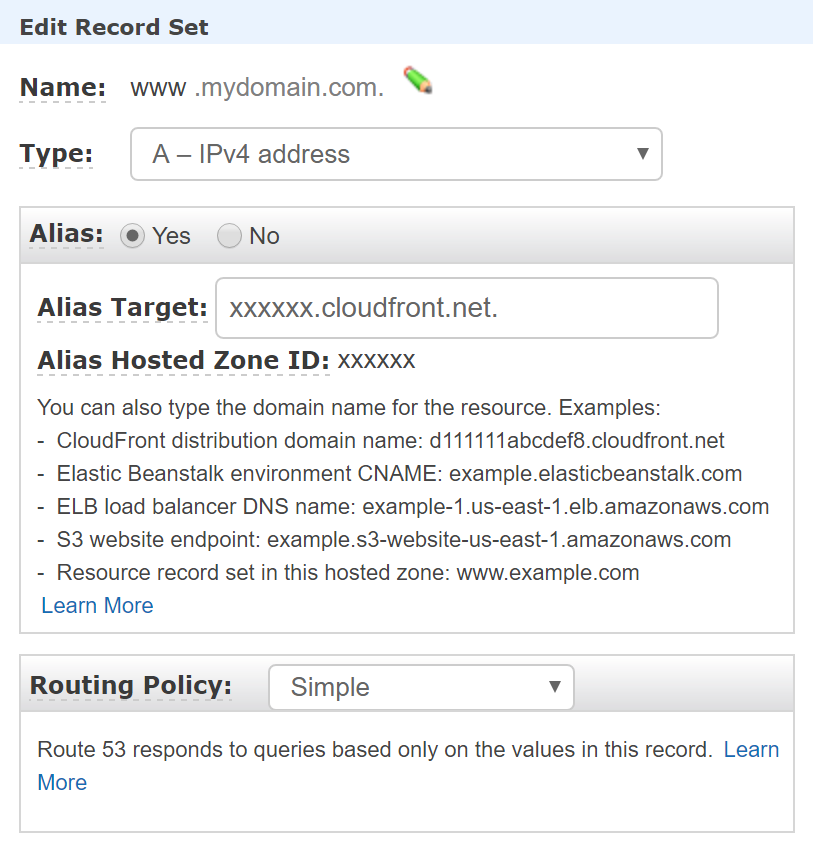
Step 6 - Create Alias records to point to CloudFront
At this point your grid site (well some of it) is being replicated across the CloudFront edge servers around the world. The final step is to point the **www **and naked domain to your site. To do this we need to go back to the Route 53 console and create 4 new Record Sets.
We need an A - IPv4 Address Record Set and an optional AAAA - IPv6 Address (for future proofing) for the www and naked domain. Remember to choose Alias Yes and paste in the distribution Domain Name you made note of previously (or select from the dropdown). Queries to Alias records are free - bonus!
That’s it. If everything went to plan you should now be able to browse to www.mydomain.com or simply mydomain.com and see your AI generated site.
I’d suggest using a few test sites to make sure everything is working:
http://dnscheck.pingdom.com - Check DNS
https://www.ssllabs.com/ssltest - Checks your SSL cert
https://tools.keycdn.com/http2-test - Checks HTTP/2 is enabled